Services Admin
Services Admin provides tools for administrations to add and edit services, including mapping services to reporting categories and fiscal categories. Services are tied to specific enrollments.
Navigation
From the left-hand navigation menu, navigate to Admin Tasks > ServiceLink > Services Admin. The Services Admin Menu displays.

Search/Edit Services
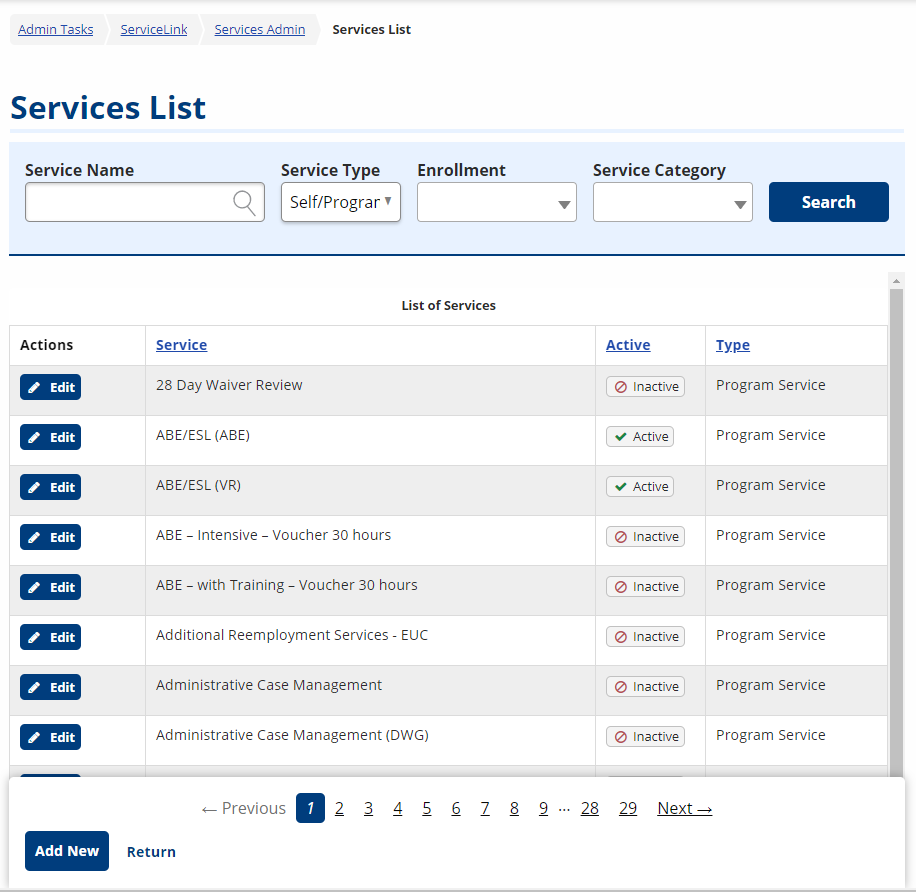
- Navigate to Services Admin. Click Services List. The Services List page displays.

- Enter one or more of the following search parameters, and then click Search:
- Service Name: Text; Type the name of the service, if known.
- Service Type: Option; Select from Self/Program, Self Service, or Program Service.
- Funding Sources (Only works with Self Service Services): List; Select the funding source.
- Enrollments (Only works with Program Services): List; Select the program of enrollment.
- Service Category: Drop-down; Select the service category that relates to the type of service.
- The Search Results display.
- Click Edit for the desired service name in the Actions column. The Edit Service page displays.
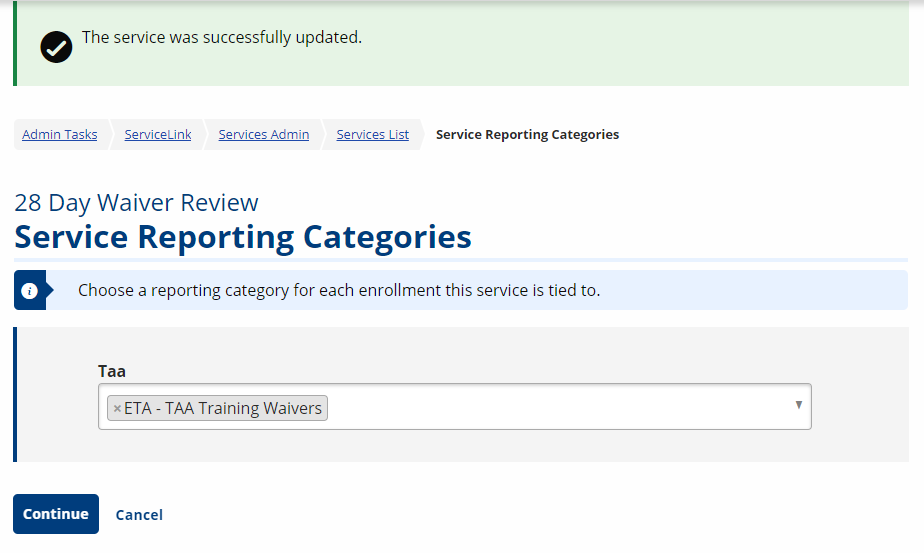
- Make the desired changes and click Continue. The Service Reporting Categories page displays.
- If you choose a funding source and enrollments, the service will become a self-service and a program service.

- Choose a category for each enrollment this service is tied to from the drop-down list.
- Click Continue. A service successfully updated confirmation message displays.

- If appropriate, choose a valid expenditure category for the service.
- Click Save Expenditures. A service successfully updated confirmation message displays and you are returned to the Services List page.
Add New Service
- Navigate to Services List. Click Add New. The New Service page displays.
- Complete the required fields as described below.
- Active: Option; Select Yes to display the service.
- Funding Source: Drop-Down; Select the funding source if this is a self-service service.
- Group Activity: Option; Select Yes if the service can be scheduled as a group activity.
- ATAA Eligible: Option; Select Yes if the service can be provided to ATAA-eligible job seekers.
- Can Non-Citizen Not Eligible to Work in the US have this service? Option; Select Allow Service if non-citizens not eligible to work in the US can receive this service.
- Does this service create multiple enrollments? Option; Select Yes or No.
- Does this service set participation date? Option; Select Yes or No.
- Does this service trigger a common participation date for open enrollments? Option; Select Yes or No.
- Is this a training related service? Option; Select Yes or No.
- Enrollments: Drop-Down; Select program enrollments to be tied to this service. Hold ctrl to select more than one enrollment.
- Service: Text; Type the name of the service.
- Click Continue.
- If a service with a similar name already exists, a Possible Duplicates message displays. Click Edit Existing Service to edit the information, or if it is a new service, click Create New.
Funding Admin
View/Edit Funding Source
- Navigate to Services Admin. Click Funding Admin. The Self-Service Funding Sources page displays.
- Click the funding source name link in the Source column. The Self Service Funding Sources [Edit] page displays.
- Edit as desired and click Save Changes.
Add New Funding Source
- Navigate to Services Admin. Click Funding Admin. The Self-Service Funding Sources page displays.
- Click Add New. The Self-Service Funding Sources [Add] page displays.
- Provide the following information:
- Active: Option; Select Yes to make the self-service funding source active.
- Funding Source: Text; Type the name of the funding source.
- Click Add New.
Set Service Order
- Navigate to Services Admin. Click Set Service Order. The Enrollments page displays.
- Select the enrollment for which you would like to set the service order.
- Click Continue. The Sort Order page displays.
- Indicate the order in which you want each service to appear using the drop-down list next to the service name. When you are finished, click Save Order.