Job Seeker Notes
Job Seeker Notes on Case Details is designed to provide a high-level record of the job seeker's participation in job search activities. Use Job Seeker Notes to record information that would be helpful to other one-stop partners providing services.
- Notes cannot be edited. The ability to delete a note is role-based.
Add Job Seeker Note
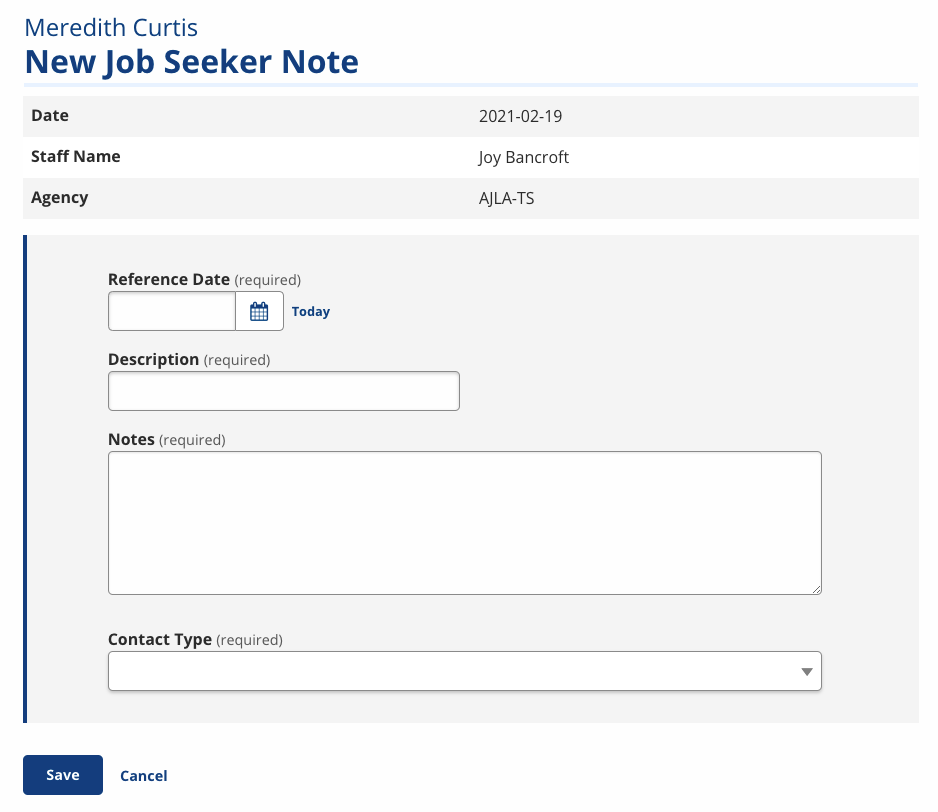
- On the job seeker's Case Details page, scroll past Program Registrations to Job Seeker Notes. Select Add Note. The New Job Seeker Note page displays.
- The date, your name, and your agency display by default. Provide the following information:
- Reference Date: Enter the day the contact was made, or select Today.
- Description: Enter a brief, descriptive subject.
- Notes: Enter details about the contact.
- Contact Type: Select the method of contact.
- The methods of contact that display can be edited in Admin Tasks > ServiceLink > Contact Types. This feature is privilege-based.
- When finished, select Save. The Job Seeker Notes page displays, with the new entry at the top.
View/Print Job Seeker Notes
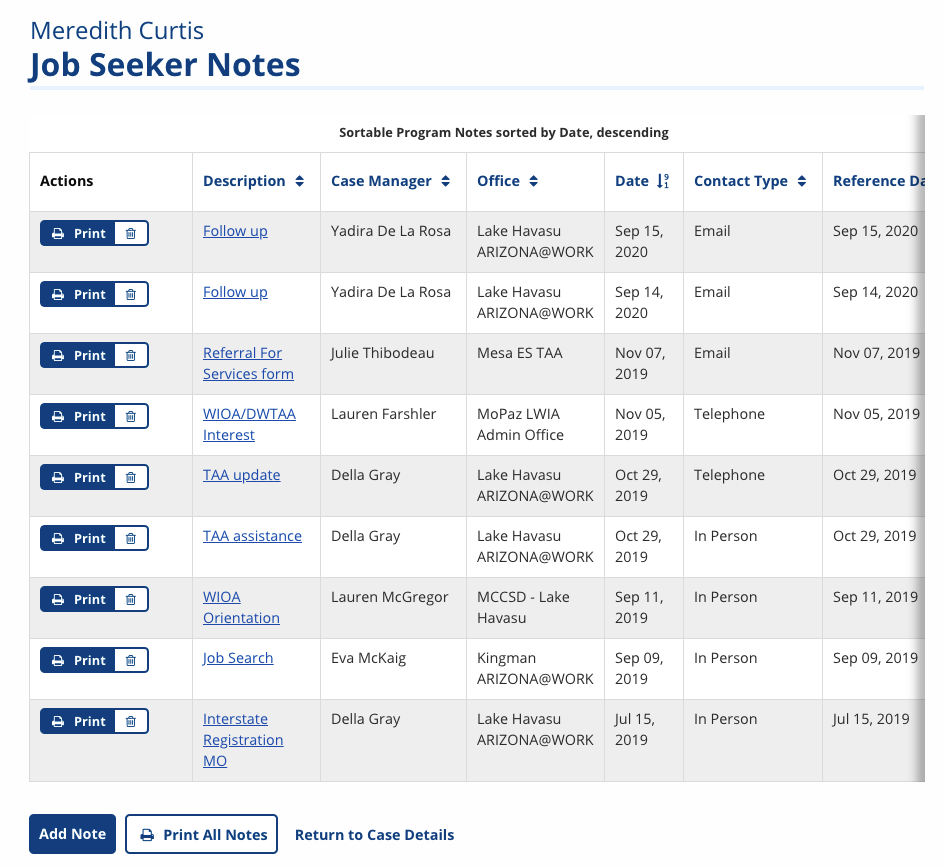
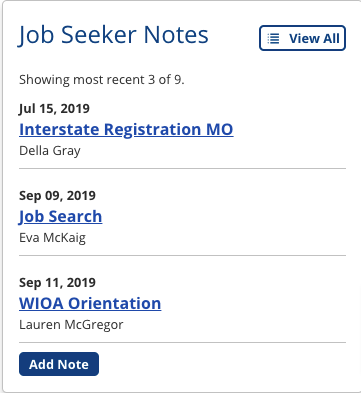
The Job Seeker Notes are featured on the Case Details page beneath Program Registrations. The three most recent notes display, with the date, the subject (which links to the note), and the staff name.
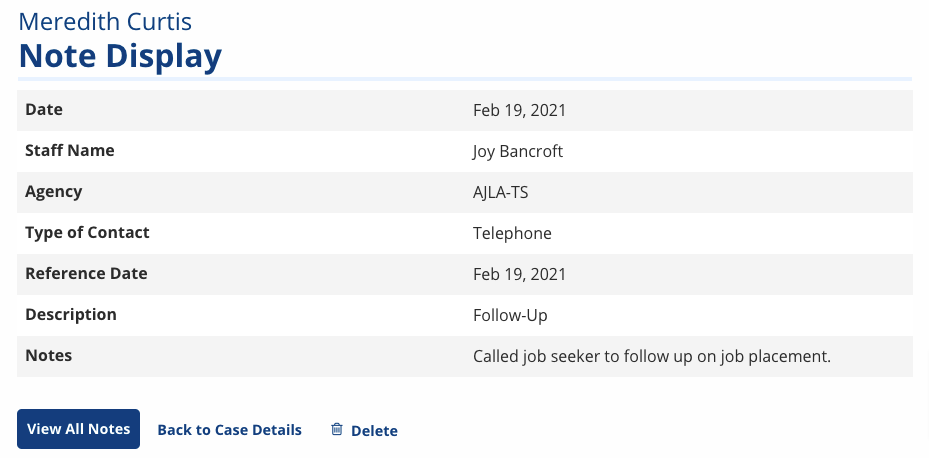
- In the Job Seeker Notes section, select the linked subject to view an individual note. The Note Display page displays.
- View All Notes: Displays the Job Seeker Notes page
- Back to Case Details: Displays the Case Details page
- Delete: Displays confirmation message. Delete only displays if you have the role-based privilege.
- In the Job Seeker Notes section, select View All to see all notes. The Job Seeker Notes page displays.
- Sort the table by Description, Case Manager, Office, Date (entered), Contact Type, or Reference Date.
- Select the Description link to view an individual note.
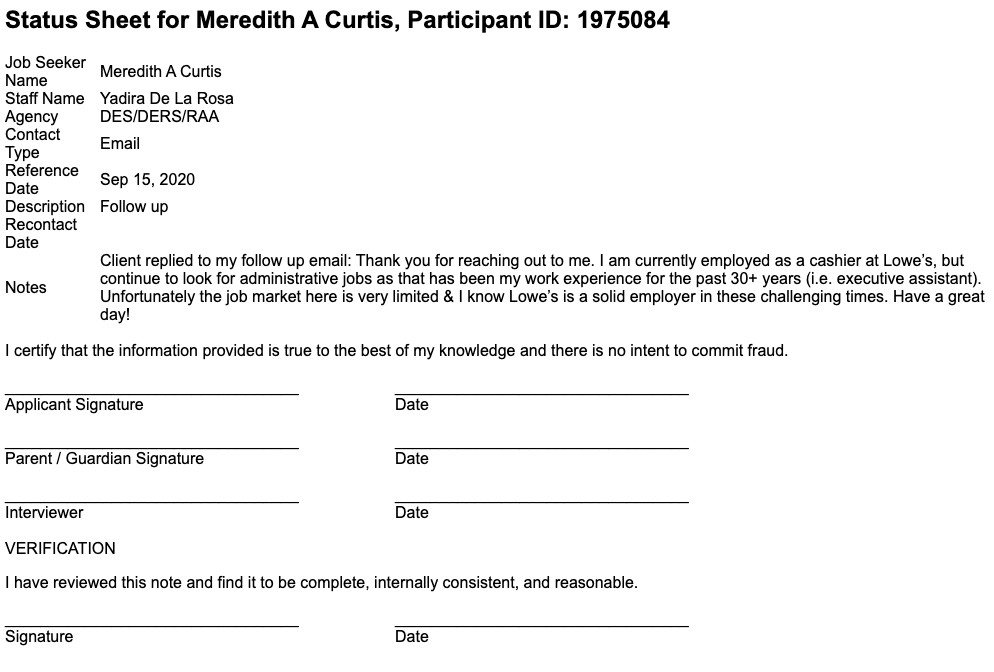
- Select Print to generate a printable view of the note with signature lines.
- Select Print All Notes to generate a printable view of all notes with signature lines.