Employer Profile
Navigation
Bring the employer into context by conducting an Employer Search or click View Profile for the employer from My Employers.
Account Information
Basic account information such as name and username can be viewed.
-
The change the contact name, click Change. You can also change the naand password management can be
Address Book
From the Address Book section, content can be added or edited (addresses, phone numbers, fax numbers, email addresses, or web addresses). The Address Book can be used to manage addresses of different locations for the company. The company address entered during Employer Registration is the main location information associated with the account. However, an indefinite number of additional addresses can be added to specify location for a job posting. The Address Book can be managed from Employer Details, in the employer's profile, or fduring the job posting creation process.
Manage Address Book
- The default contact information in the employer's address book is taken from the information provided when the employer account was first created.
- Click Edit to open the Address Book page. Content is editable by clicking Edit within a specific each section.
- Make the necessary changes to existing information.
- Click Save [name of section] when finished.
- Click Add [name of section] to add additional employer information.
Add an Address
- Label: Text; Type a unique label for the address that will help you distinguish it from other addresses, such as “Home.” The label will not display on the resume.
- Address: Text; Type the street address.
- Address Line 2: Text; Type additional address information, such as apartment number.
- ZIP Code: Text; Type the ZIP code. The City and State are automatically populated once a selected ZIP is selected or when you tab/click away from this field.
- City: Populated from the ZIP code but can be modified if needed.
- State: Drop-down; Populated from the ZIP code but can be changed if needed. If the address is outside the United States, select International.
- Country: Select the country; defaults to United States.
- International State/Province: Text; If you selected a country other than the United States, type the international state/province
- International Postal Code: Text; Type international postal code for country outside the United States.
- Click Add Address.
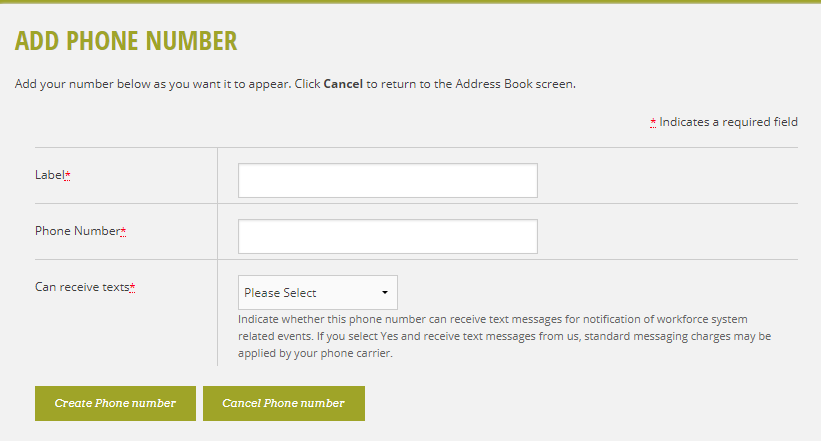
- Label: Text; Type a unique label for the phone number that will help you distinguish it from other phone numbers, such as “Home.” The label will not display on your resume.
- Phone Number: Text; Type the phone number.
- Can receive text: (Drop-down) Select Yes or No. Select Yes if the phone number entered can receive text messages.
- Click Add Phone.
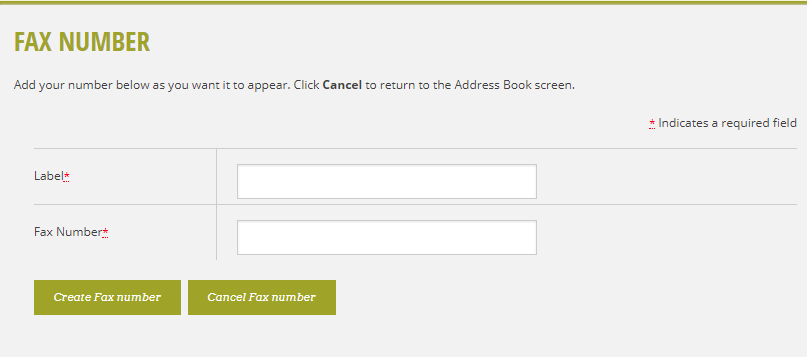
- Label: Text; Type a unique label for the fax number that will help you distinguish it from other fax numbers, such as “Personal.” The label will not display on your resume.
- Fax Number: Text; Type the fax number.
- Click Add Fax Number.
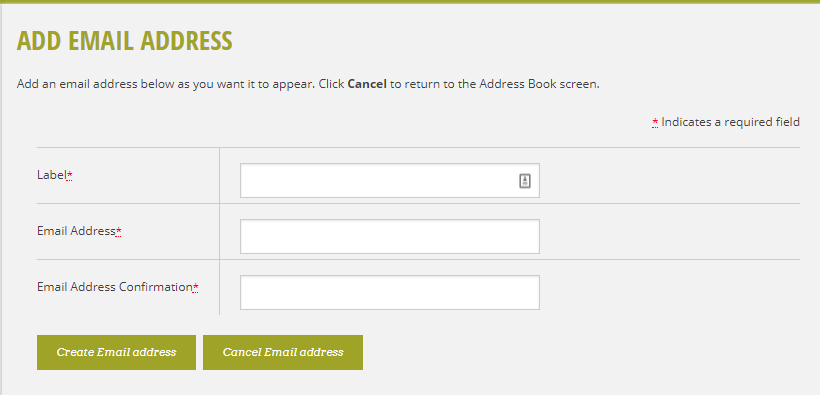
- Label: Text; Type a unique label for the email address that will help you distinguish it from other email addresses, such as “Personal.” The label will not display on your resume.
- Email Address: Text; Type the email address.
- Email Address Confirmation: Text; Re-enter the email address.
- Click Add Email.
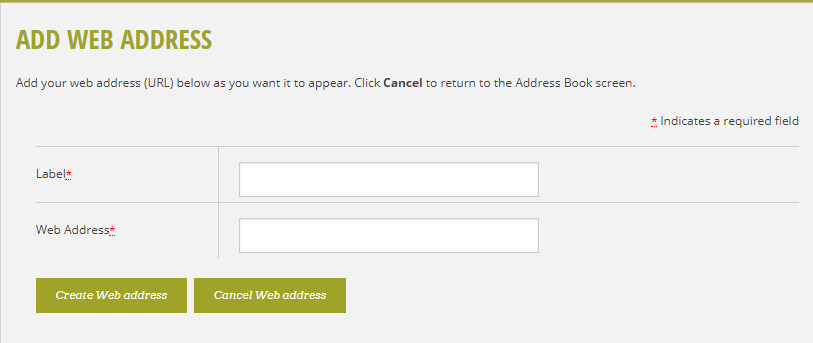
- Label: Text; Type a unique label for the web address that will help you distinguish it from other web addresses, such as “Business.” The label will not display on your resume.
- Web Address: Text; Type the web address (URL).
- Click Add Web Address.
- Click Revoke Email Confirmation to require the employer to verify their email address again.
Employer Information
The Employer Information is the information from the Add Employer page. This is the information entered or updated by the employer or casetracker when the employer's account is created or most recently updated.
From this section you can update employer information. Click Edit to open the Edit Employer Information page, make the necessary changes, and then click Update Employer when finished.
Employer Use Policy
Click View Employer Use Policy to open the Employer Agreement Policy page. Review the page, and then click Accept or Decline.
Job API
Click Read more about the Job API to learn more about using the Job API feature.
Click Generate Token if you will use this feature.
Notifications
Employers and staff can view a list of all notifications sent to the employer from AJL. The content of the message will not display if it contains sensitive information, such as username and password. These redacted messages have a Security status.
View Notifications
- Scroll to the Notifications section. A list of notifications displays, with the following information:
- Subject: Dependent on message. Click the subject title to view the message.
- Date: Date the notification was sent
- Click More Notifications to view additional notification details.
- Status: Sent or Unsent
- Recipient: The contact name on the employer account.
- Sender: System
- Subject: Dependent on message
- Date: Date the notification was sent
- Click the recipient name to open the Employer Profile page.
-
Click the subject title to view the message.
- Only users with the "Notifications" privilege can view the body text. Also, messages with the category "Secure" will not display any body text because personal account information was sent in the message.