Create Staff-Assisted Job Seeker
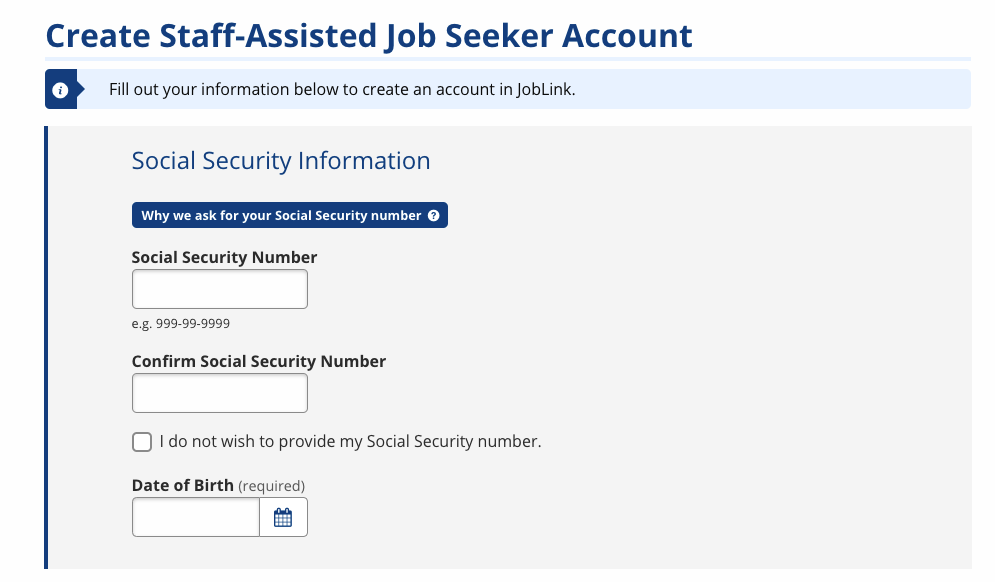
The Create Staff-Assisted Job Seeker page is the first step of creating a staff-assisted job seeker account. This page creates account information, including credentials and contact information. The following instructions apply to the Create Staff-Assisted Job Seeker page. Below is a screenshot of the page, as well as a table listing each field and description of the content required. For a high-level description of creating a job seeker account, please see Add Job Seeker Overview.
- Completing this page creates the job seeker account; if additional demographic information is not provided at this time, the job seeker or the staff can complete the demographics at a later time.

- At minimum, complete all required information, which is indicated by (required). Additional questions may display or be required based on the information you provide and your state.
- To explain why we collect the SSN, select " Why we ask for your Social Security number." Once the SSN is saved, only staff with the privileges can edit or delete the SSN through Admin Tasks. A validation error will display if the SSN already exists in the system.
- Passwords must be between 9 and 20 characters and must pass a strength test (indicated visually by a green bar). A password that contains dictionary words or patterns that are easy to identify is considered weak. “Dictionary” words include first names, surnames, proper nouns, years, etc. The use of characters to replace common letters, like “3” for “E” or “@” for “a” is also often considered weak. An example of a weak password is "December_2017" while a much stronger password would be "Decembrr12" or "ItIs20Dec17."
- If your state has enabled text messaging, this number will be used to send password reset notifications.
- Review the privacy policy with the job seeker, then select Submit. The Privacy Policy and Terms of Agreement page displays.
- After you have successfully submitted this page, the job seeker may log in, and you can search for and review their record from the Job Seeker Search or User Search.
| Field | Description |
|---|---|
| Social Security Number | (Digits) Enter the job seeker's Social Security number. |
| Confirm Social Security Number | (Digits) Re-enter the job seeker's Social Security number. |
| I do not wish to provide my Social Security number. | (Check Box) Select the check box if the job seeker declines to provide their SSN. |
| Date of Birth | (Text/Calendar) Select or enter the job seeker's date of birth. |
| Account Information | |
| Username | (Text) Enter a username. Usernames must be 6-20 characters long and may not contain spaces or special characters. |
| Password |
(Text) Enter a password. Select Show to view the text you have entered. |
| Confirm Password | (Text) Re-enter the password. Select Show to verify the text you have entered. |
| Security Question | (Drop-Down) Select a security question to which the job seeker will remember the answer. The security question will be used to verify the user's identity in case they forget their username or password. |
| Security Question Answer | (Text) Enter the answer to your security question. |
| Profile Information | |
| First Name | (Text) Enter the job seeker's first name. |
| Middle Initial | (Text) Enter the job seeker's middle initial or name. |
| Last Name | (Text) Enter the job seeker's last name. |
| Phone | (Digits) Enter the job seeker's primary telephone number, including the extension, if available, as ###-###-####x####. |
| Cell Phone | (Digits) Enter the job seeker's cell phone number. |
| Fax | (Digits) Enter the job seeker's fax number. |
| (Text) Enter the job seeker's email address. | |
| Email Confirmation | (Text) Re-enter the job seeker's email address. |
| Address Line 1 | (Text) Enter the street address of the job seeker's residence. If the job seeker does not have an address of residence, use the address of the local American Job Center. |
| Address Line 2 | (Text) Enter any additional address information, including apartment or building number. |
| ZIP | (Digits) Enter the job seeker's five-digit ZIP code. A drop-down will display confirming the ZIP matches the city and state entered. When you select the ZIP, the city and state will be updated to match the ZIP information. |
| City | (Text) Enter the job seeker's city of residence. |
| State | (Drop-Down) Select the job seeker's state of residence. |
| Country | (Drop-Down) Select the job seeker's country of residence. The United States is the default selection. |
| International State/Province | (Text) If you selected a country other than the United States, enter the international state/province and international postal code. |
| Work Phone | (Digits) Enter the job seeker's work telephone number. |
| Work Email | (Text) Enter the job seeker's work email address. |
| How did you hear about our services? (Check all that apply.) | (Check Box) Select all ways in which the job seeker heard about our services. Question and options may vary by state. |